

In rough drying vs section drying, fingers and airflow remove excess moisture first; a brush and controlled sections create the finished shape. Rough drying prioritises speed and root direction.
Section drying adds tension and precision, helping you smooth lengths, curve ends or build volume where you want it.
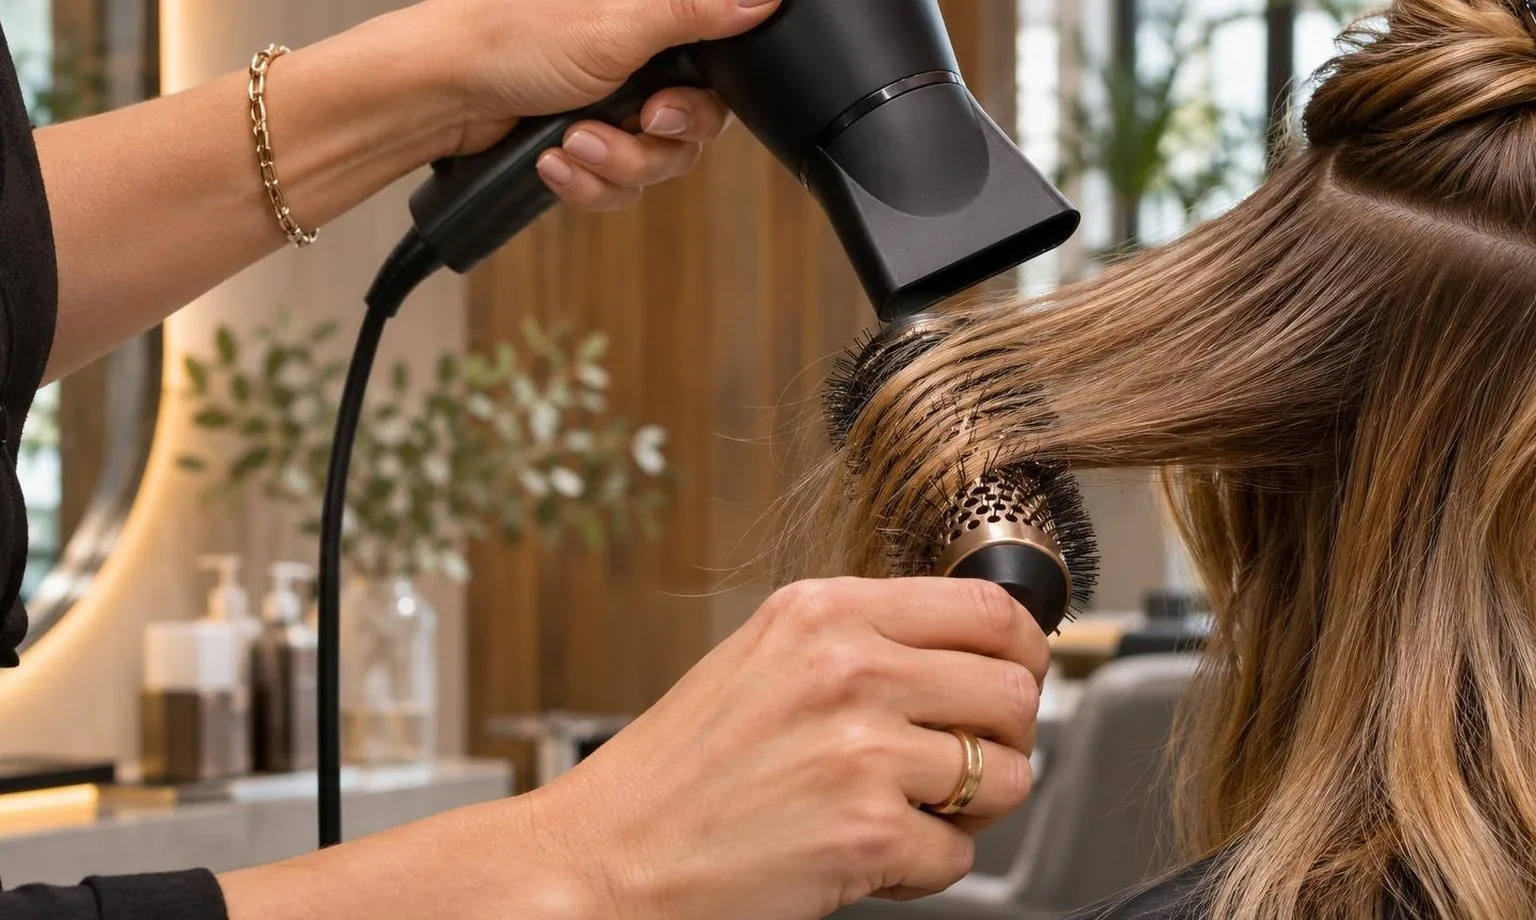
For a controlled finish, switch to sections about 2.5 cm deep, keeping each narrower than your brush barrel. Direct airflow from roots towards ends rather than lifting strands against their direction.
The right balance depends on your texture and target style: not every blowout needs the same starting point.
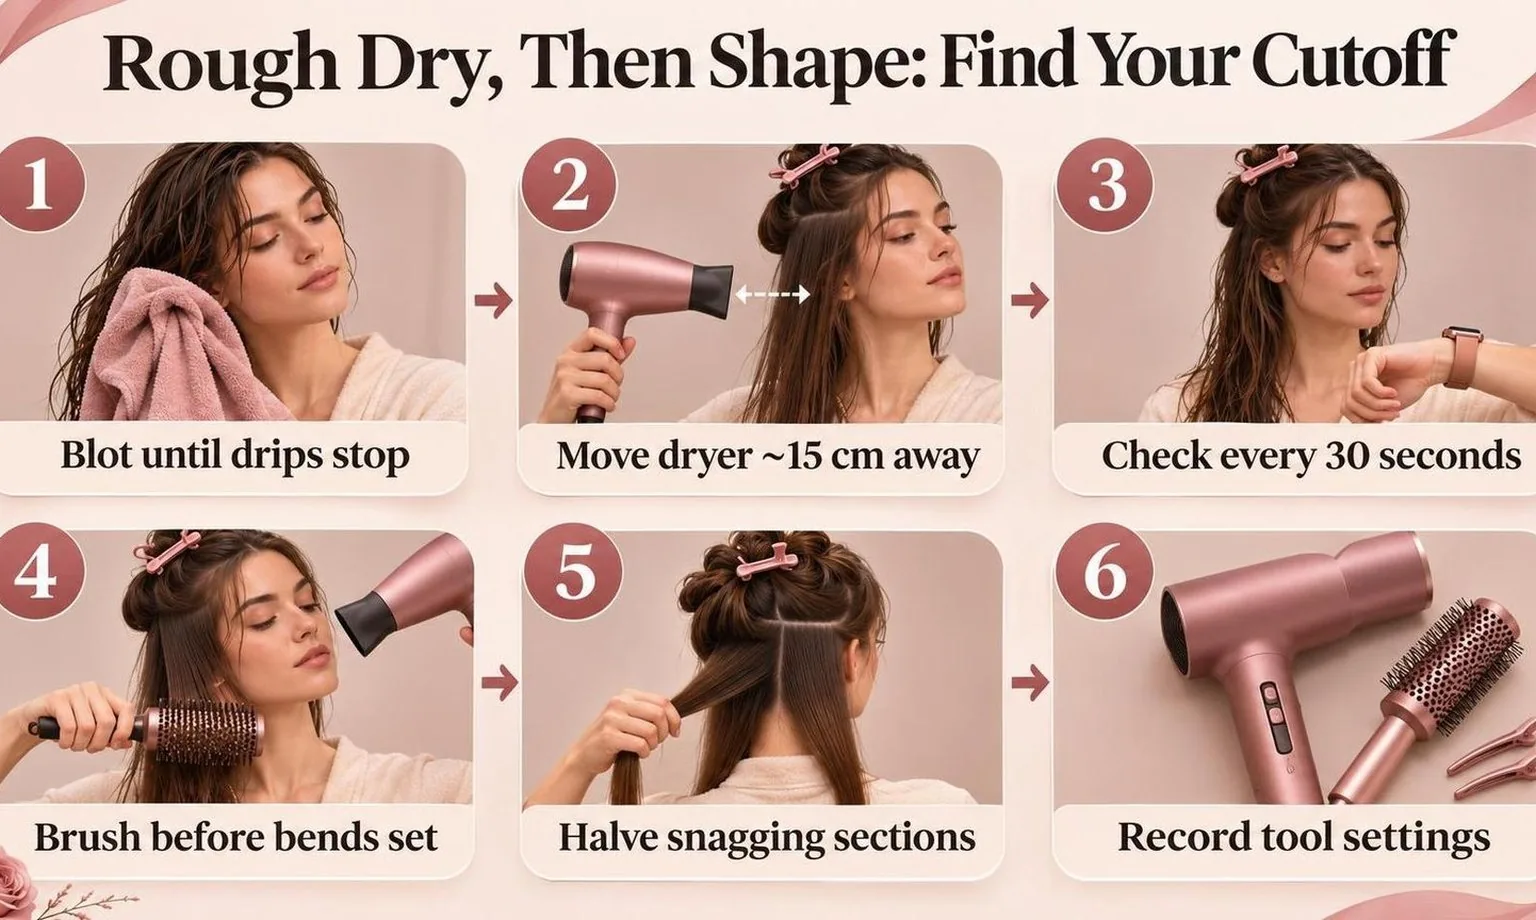
Find Your Rough-Drying Cutoff
Use one wash to decide when fingers should give way to a brush. Rough drying removes moisture without shaping individual sections; section drying adds controlled tension and direction.
Your cutoff depends on where your hair starts setting into a shape you do not want.
Blot until water stops dripping. Fit your concentrator, select low or medium heat, and keep the dryer moving. Start with fingers only, checking a small section above each ear every 30 seconds.
| What you notice | Your next move |
|---|---|
| Fine, straight hair lies flat, but lengths remain damp. | Switch to section drying at the roots. Start with sections 2 cm deep and a 25–35 mm round brush. |
| Dense, mostly straight hair stays wet underneath. | Lift it in loose panels. Continue rough drying underneath in 30-second rounds until evenly damp, then shape. |
| Waves, curls or hairline bends begin setting before you smooth them. | Stop rough drying that area. Shape while damp in sections 1–2 cm deep, leaving untouched areas clipped away. |
Keep each section narrower than your brush barrel’s usable length. If the brush stalls or strands escape, halve the section rather than increase heat. Finish each section before releasing the next.
Record your rough-drying time, heat setting, brush diameter and section depth. At home, repeat that setup next wash. In a salon, add it to the client’s styling notes. These dimensions are starting points, not universal targets.
Distance reference for moving airflow: https://pmc.ncbi.nlm.nih.gov/articles/PMC3229938/. Its laboratory findings do not establish a universal rough-drying percentage.
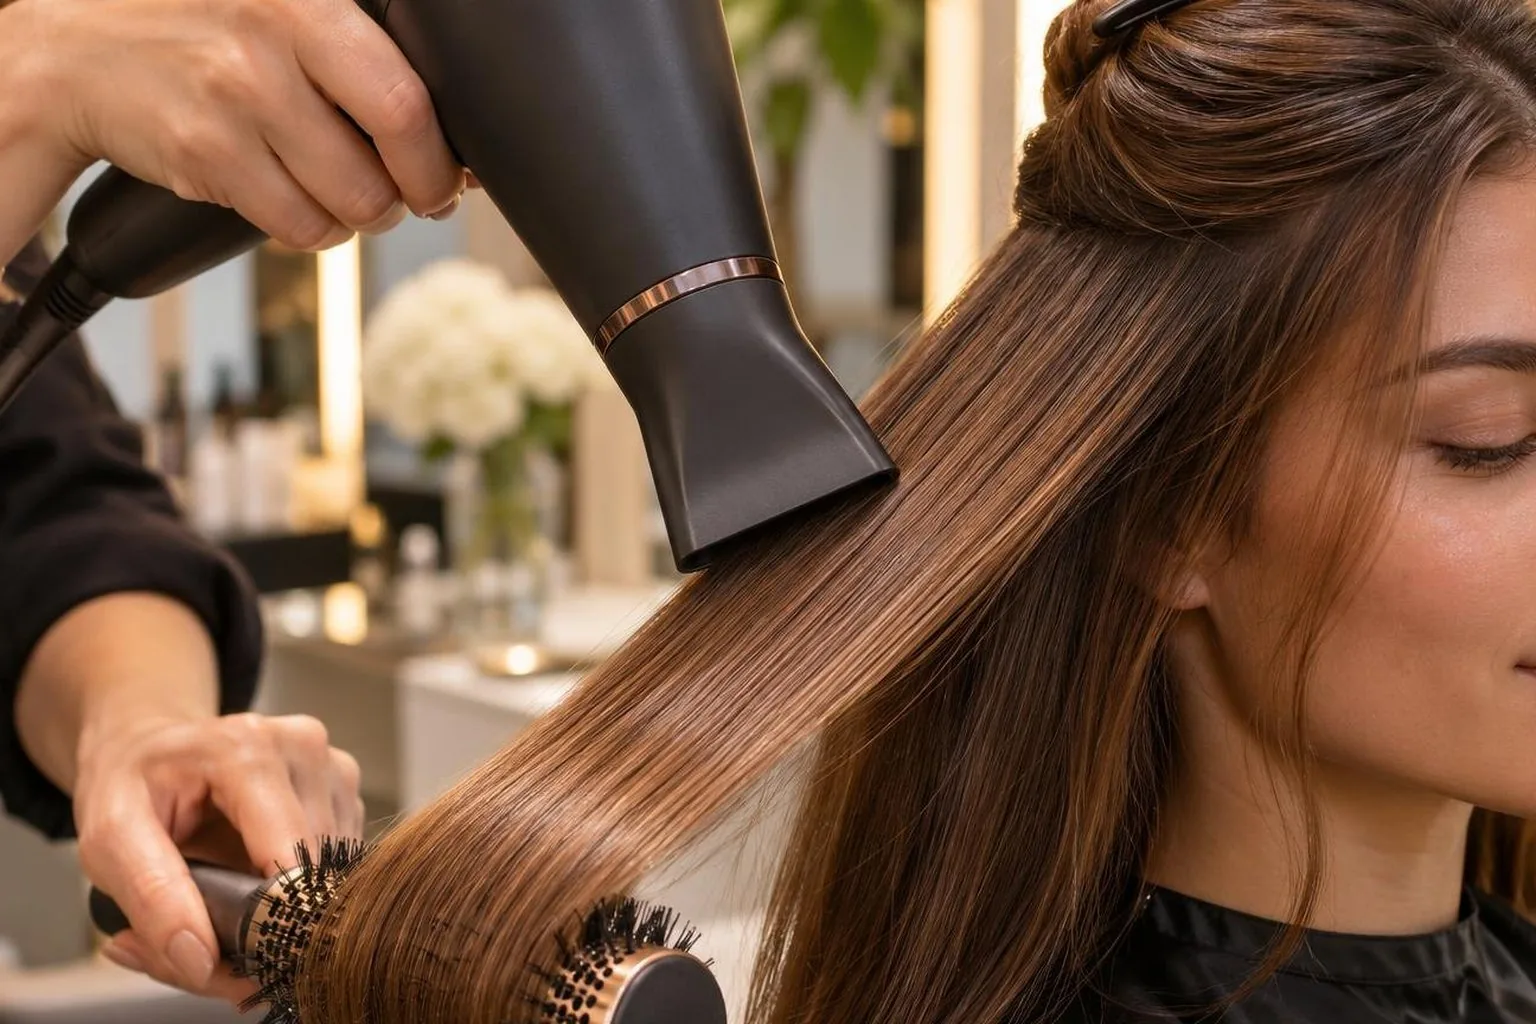
The Numbers That Matter Here
Distance, temperature and section size matter more than a promised drying-time saving. Rough drying removes moisture without shaping each section; section drying adds controlled tension and direction.
Use measurable working dimensions, but treat percentage-dry targets as salon shorthand, not instrument readings.
What the temperature evidence actually shows
In “Hair Shaft Damage from Heat and Drying Time,” published in Annals of Dermatology, researchers tested these combinations on hair samples. The temperatures describe experimental conditions, not settings that every dryer will reproduce.
| Dryer distance | Reported temperature | Exposure per drying cycle |
| 15 cm | 47°C | 60 seconds |
| 10 cm | 61°C | 30 seconds |
| 5 cm | 95°C | 15 seconds |
Surface damage increased as drying temperature increased. However, distance, temperature and exposure changed together: this was not a clean test of temperature alone. Nor did it compare rough drying with brush-led section drying.
The useful takeaway is directional: closer airflow can create hotter working conditions. Do not read the shortest laboratory exposure as a recommended styling time, or assume a dryer’s low setting produces the lowest temperature shown.
Source: “Hair Shaft Damage from Heat and Drying Time,” Annals of Dermatology. Full methods and microscopy findings: https://pmc.ncbi.nlm.nih.
Working dimensions for the salon floor
The following dimensions are practical starting points for medium-length hair, not experimentally validated limits. Adjust them for density, texture and the intended finish.
Barrel diameter describes the brush barrel, excluding the bristles; manufacturers do not always label that measurement consistently.
| Stage or tool | Starting point | How to apply it |
| Rough-drying distance | About 15 cm | Keep the dryer moving; use fingers to separate dense areas rather than concentrating heat. |
| Finishing section | 2.5–5 cm wide; 0.5–1 cm deep | Keep the section within the brush’s usable width. Reduce depth when the underside stays damp. |
| Round-brush barrel | 32–45 mm diameter | Start here for medium-length shaping. Confirm that the hair wraps securely without tangling. |
| Cooling hold | 5–10 seconds initially | Keep the shape supported under cool airflow; release when the section feels cool. |
Why percentage-dry claims need context
A stylist cannot establish remaining water content by touch alone. Surface dryness also hides moisture inside a thick subsection.
Replace a universal percentage target with a functional checkpoint: the hair should remain pliable enough to reshape, without wet strands clumping together.
For a smooth finish on hair that sets into its natural pattern quickly, begin controlled section work earlier. For a loose, airy finish, remove more moisture first. Neither choice guarantees a fixed time saving across different heads of hair.
- Check the roots, mid-lengths and ends separately before switching techniques.
- If the outside feels dry but the underside remains damp, make the subsection thinner rather than increasing heat.
- Record rough-drying and section-finishing times separately. Compare appointments only when length, density, starting wetness and finish are similar.
The goal is fewer corrective passes, not the hottest or fastest possible blowout. Stop heating a section once it is dry and shaped; cool it before release.
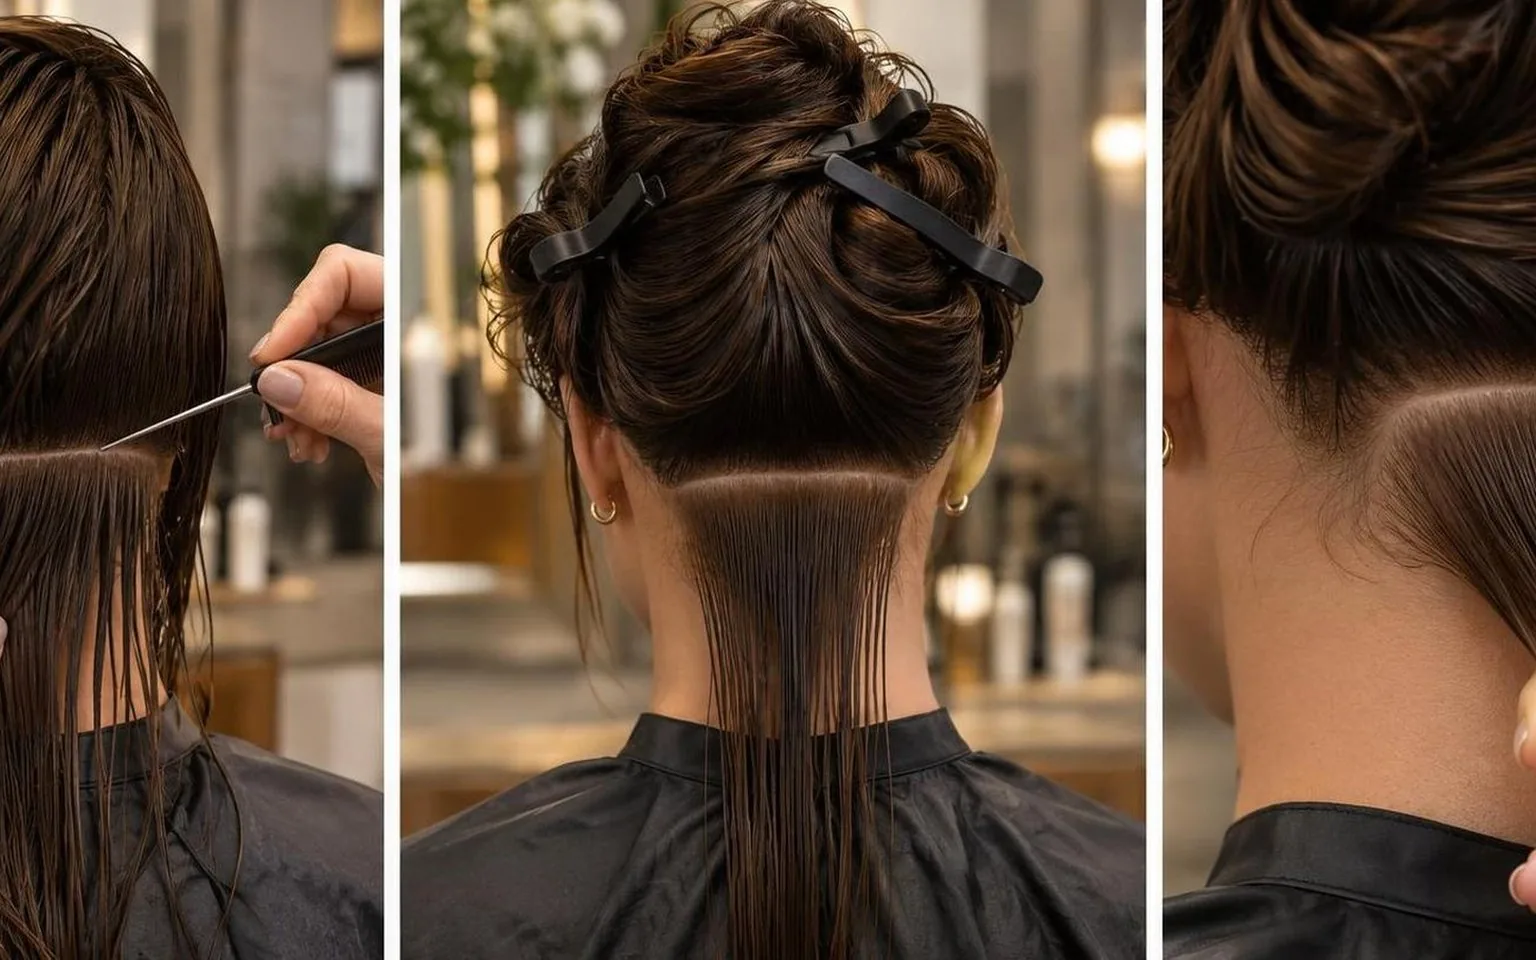
What Tips It One Way
Hair texture, starting wetness and the finish you want decide whether rough drying or section drying should dominate.
Remove free water without a brush when speed matters; introduce controlled sections earlier when you need to redirect roots, smooth resistant texture or preserve a deliberate shape.
Let the Finish Decide
Rough drying means removing moisture without holding each section under brush tension. It prepares hair for styling rather than delivering a polished finish by itself.
Section drying combines directed airflow, brush control and tension to shape smaller areas deliberately.
- For a smooth blowout: Rough dry lengths gently, then switch to sections while the hair still feels damp and pliable. Waiting until it feels dry makes resistant bends harder to reshape without rewetting.
- For root lift: Work on the roots before they settle into their natural direction. Lift them with fingers or a brush and direct airflow deliberately rather than blasting the whole head randomly.
- For defined natural curls: Neither aggressive rough drying nor a tension-led blowout is the default. Diffuse with minimal disturbance instead; repeated handling can separate curl groups and change the intended finish.
Use Size and Distance as Controls
The working dimensions below are starting points, not universal settings. Hair density, brush design and airflow change how much hair you can control. Reduce the section whenever its underside stays damp or the brush loses its grip.
| Control | Practical reference | What it changes |
| Section depth | Start around 1–2 cm. | Thinner sections make hidden damp patches easier to reach. |
| Section width | Start around 3–5 cm, within the brush’s usable width. | A contained section is easier to tension evenly. |
| Dryer distance | A laboratory study tested 15 cm with continuous movement. | This supports keeping the dryer moving and away from direct contact, not a universal styling prescription. |
Density Matters More Than a Dryness Percentage
Dense hair can feel dry on top while retaining moisture underneath. Lift the crown and check behind the ears and at the nape before switching techniques.
Fine hair may reach the shaping stage quickly, so prolonged rough drying can remove your remaining styling window.
Skip rigid percentage targets. At the chair or bathroom mirror, dryness percentages are estimates, not measurements.
Start brushwork when water no longer flicks from the lengths but the section remains evenly damp; bring difficult fringes and stubborn partings under control earlier.
Keep Heat Proportionate
Use the lowest effective heat and keep airflow moving. Aim from roots toward ends for a smoother surface. If a section stays damp, make it smaller before increasing heat; extra temperature cannot compensate for an overloaded brush.
Evidence: Lee and colleagues, “Hair Shaft Damage from Heat and Drying Time,” in Annals of Dermatology, found greater surface damage at higher tested temperatures.
The study examined drying conditions, not rough drying versus section drying, so it cannot establish a winning technique.

How to Judge It on Real Hair
Judge rough drying against section drying by checking root dryness, surface alignment, and whether the shape survives cooling.
Rough drying should remove surplus water efficiently; section drying should add control without repeatedly reheating hair that already feels dry.
Compare matched areas, not different heads
Choose adjacent areas with similar density, length, and natural texture. Apply the same preparation product evenly, then keep the dryer, attachment, heat setting, and airflow unchanged.
Change only the drying method so the comparison tells you something useful.
Use these starting dimensions for a controlled salon test, not as universal rules. Dense hair may need thinner sections; shorter hair may need a smaller brush.
| Test variable | Suggested setup | What it reveals |
| Matched test areas | Choose 2 adjacent panels, each approximately 4 cm wide. | Similar panels make differences in finish easier to judge. |
| Section thickness | Start with a 1 cm-deep subsection for brush drying. | Check whether airflow reaches the interior, not merely the surface. |
| Round-brush diameter | Try a 35 mm barrel on shoulder-length hair. | Keep brush size constant rather than confusing brush effects with drying method. |
| Cooling check | Wait 30 seconds after releasing each panel. | Inspect the result after immediate warmth has dissipated. |
Read the roots, middle, and ends separately
After rough drying, lift the panel and feel underneath. Surface fluffiness does not prove the roots are ready. A cool patch can suggest remaining moisture, but temperature alone is unreliable; separate the strands and check for dampness directly.
Watch how the brush enters. Hair that still clumps wetly needs more moisture removal before prolonged shaping. Hair that is already dry, expanded, and difficult to redirect may have passed the useful rough-drying stage for that particular finish.
For curl-prone hair being straightened, begin controlled section work while enough moisture remains to reshape it. For an airy finish on easily managed hair, rough drying can do more preliminary work.
Avoid treating a claimed dryness percentage as a measurable salon endpoint.
Separate useful heat from excessive exposure
Keep airflow directed along the hair and keep the dryer moving. Published laboratory work found greater surface damage at higher tested drying temperatures.
Its experimental distances and temperatures describe that setup, not guaranteed temperatures from your dryer.
| Experimental distance | Reported drying temperature |
| 15 cm | 47°C |
| 10 cm | 61°C |
| 5 cm | 95°C |
Source: Hair Shaft Damage from Heat and Drying Time of Hair Dryer, Annals of Dermatology. https://pmc.ncbi.nlm.nih.gov/articles/PMC3229938/ This hair-tress experiment informs heat management;
It does not establish which salon drying method produces the best finish.
Score the cooled result
- Check root direction and lift before smoothing the surface with your hands.
- Compare flyaways, end alignment, and brush drag under the same lighting.
- Record total working time, including corrective passes rather than only initial drying.
- Prefer the method that delivers the target shape with fewer corrections. Rough drying wins preparation time only when it does not create extra finishing work.
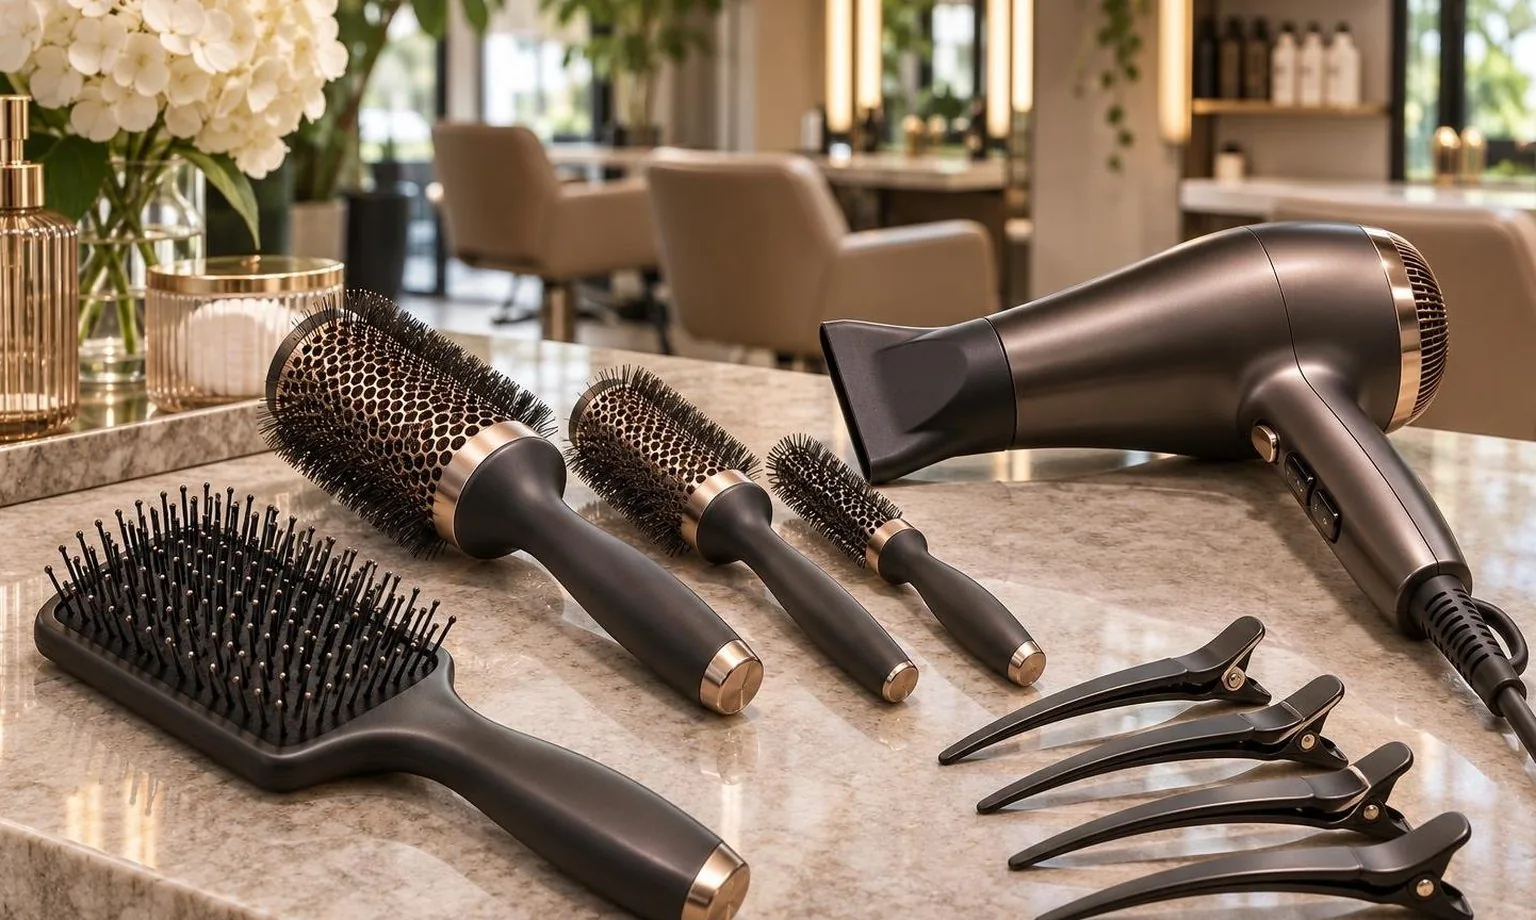
How It Compares to the Alternatives
Rough drying removes excess moisture quickly; section drying controls shape, smoothness and root direction.
For a polished blowout, they usually work best together: rough dry without stretching out the process, then finish manageable sections with a brush and directed airflow.
Rough drying versus section drying
Rough drying uses fingers rather than sustained brush tension. It suits the preparation stage, but stopping there generally leaves less consistent alignment, especially around the crown, fringe and ends.
Section drying gives those areas deliberate direction instead of relying on how they settle.
| Decision | Rough drying | Section drying |
| Main purpose | Remove moisture and establish general root direction. | Refine surface alignment, volume and bend. |
| Working area | Move through loose areas with fingers. | Clip away surrounding hair; work within the brush’s usable width. |
| Suggested starting section | No fixed section dimensions. | Try approximately 2–4 cm wide, reducing thickness until airflow reaches through. |
| Best stopping point | Hair remains damp enough to reshape. | The section feels dry throughout; let it cool before disturbing the shape. |
| Time trade-off | Less handling, but limited finish control. | More handling, but fewer untouched areas when sectioning stays consistent. |
The section dimensions above are a practical starting point, not a tested optimum. Density, length, brush size and airflow determine the workable amount.
A section that stays damp underneath is too thick for the current technique, even if its surface looks finished.
When each approach falls short
- Fine or easily flattened hair: Establish root direction early. Rough drying everything downward can make subsequent lift harder to build.
- Dense hair: Remove bulk moisture first, then subdivide thoroughly. Large sections can hide damp interiors and encourage repeated surface heating.
- Fringes and strong growth patterns: Shape these before they dry into place. Leaving them until the final stage can require rewetting.
- Curls kept curly: Choose gentle diffusing rather than brush-led section drying. Finger-raking during rough drying can separate curl groupings.
Air drying and diffusing as alternatives
Air drying avoids dryer heat but offers less control over root lift and a brushed finish. Diffusing distributes airflow and supports existing texture; it does not reproduce the tension-driven smoothing of a brush blowout.
Neither method has a universal time advantage across lengths and densities.
Heat exposure matters more than the label
Lee and colleagues’ laboratory study, “Hair Shaft Damage from Heat and Drying Time of Hair Dryer,” in Annals of Dermatology, found increasing surface damage at higher tested temperatures.
Its dryer conditions included the following paired distances, temperatures and exposure times.
| Dryer distance | Test temperature | Exposure per drying cycle |
| 15 cm | 47°C | 60 seconds |
| 10 cm | 61°C | 30 seconds |
| 5 cm | 95°C | 15 seconds |
These are experimental conditions, not recommended styling settings or proof that rough drying beats section drying. Dryer output varies. Keep airflow moving, avoid resting the nozzle against hair, and stop heating a section once it is dry.
Bottom line: Rough dry for moisture removal, section dry for finish, and diffuse for preserved texture. Switch methods according to the result you need, rather than treating one technique as universally faster or gentler.

Heat Without the Cost to Hair
Reduce unnecessary heat exposure by rough drying away excess moisture, then section drying only where you need shape and polish.
Neither method is damage-free: keep the dryer moving, avoid concentrated heat, and stop heating each section once it is dry.
Separate water removal from styling
Rough drying means moving air through the hair without holding each section under brush tension. Section drying isolates smaller panels so airflow and tension can shape them precisely.
Using a round brush from dripping wet adds handling before that precision becomes useful.
First, blot with a towel rather than rubbing. Rough dry with your fingers, directing airflow from roots towards ends.
Switch to controlled sections when the hair no longer drips and the lengths remain slightly damp; estimated dryness percentages are not reliable measurements.
For curlier textures requiring substantial smoothing, begin controlled section work earlier, while the hair remains pliable. Rough drying everything almost completely can leave a shape that needs rewetting or repeated passes.
Adapt the transition to the intended finish, not a universal percentage.
What the temperature evidence actually shows
Lee and colleagues’ laboratory paper, “Hair Shaft Damage from Heat and Drying Time of Hair Dryer,” published in Annals of Dermatology, tested these dryer conditions.
The temperatures describe the experimental exposure, not universal dryer settings or recommended salon targets.
| Distance from hair | Reported temperature | Exposure per drying cycle |
| 15 cm | 47°C | 60 seconds |
| 10 cm | 61°C | 30 seconds |
| 5 cm | 95°C | 15 seconds |
Surface damage increased as temperature rose. Because distance, temperature and duration changed together, the experiment does not establish a universally safe temperature or prove that rough drying beats section drying.
It supports avoiding hot, close-range exposure rather than chasing the shortest drying time.
Control the nozzle, section and stopping point
- Keep separation. Use approximately 15 cm between nozzle and hair as a practical starting point, not a safety guarantee. Never rest the nozzle against hair wrapped around a brush. Move along the section instead of parking over the ends.
- Choose manageable panels. Start with sections approximately 4 cm wide and 1 cm deep, adjusting for density and brush size. Air must reach the interior; a polished outer layer can hide a damp centre that invites extra passes.
- Match heat to the task. Start on the lowest heat that dries effectively. Increase airflow before increasing temperature, provided it does not scatter the section. Follow the dryer’s instructions because switch labels do not specify the temperature reaching the hair.
- Finish, then release. Once a section feels dry, stop applying heat. Hold its shape under cool airflow before releasing the brush. Cooling helps retain the finish; it does not reverse damage from earlier overheating.
Heat protectant supplements this technique; it does not make unlimited passes harmless. Follow its application directions, distribute it evenly, and judge the finish by dryness and shape rather than how hot the hair feels.
Frequently Asked Questions
What is the difference between rough drying and section drying?
Rough drying removes initial moisture with airflow and your fingers, without shaping every strand. Section drying uses clips, a brush and directed airflow to shape individual panels, giving more control over root lift, smoothness and ends.
How dry should hair be before switching to section drying?
For a smooth blowout on straight or loosely wavy hair, aim for roughly 70–80% dry before brushing section by section. Treat that percentage as a working estimate: hair should feel damp, not wet, with no droplets when you squeeze a panel.
Should curly hair be rough dried before a smooth blowout?
When stretching curls smooth, begin controlled section drying while hair remains evenly damp; extensive rough drying can leave roots harder to reshape.
If you want to preserve curls instead, use a diffuser with minimal handling rather than brushing sections under tension.
How large should each section be for brush drying?
Start with panels approximately 2–3 cm thick and no wider than your brush barrel’s working length. Reduce thickness for dense hair so airflow reaches the whole panel, then finish drying each section before releasing it.
Which method exposes hair to more heat?
Neither method is automatically gentler; distance, heat and exposure time matter more than the label. A laboratory study in Annals of Dermatology found greater surface damage at higher drying temperatures.
Keep the dryer moving, start around 15 cm away and avoid repeatedly heating already-dry sections.
Related Reading
- Blow dry or air dry: what each does to hair
- Diffusing curls without breaking the pattern
- How to make a blowout last past day two
- Blow drying thick hair faster without cutting corners
- Root volume that survives the first hour
- The complete guide to blow drying technique
- PubMed — Hair Shaft Damage from Heat and Drying Time
- Occupational Safety and Health Administration — Electrical Safety
- Small Business Administration — Apply for Licenses and Permits
- California Board of Barbering and Cosmetology
- Texas Department of Licensing and Regulation — Barbering and Cosmetology
- Electrical Safety First — Safety Guidance
- Health and Safety Executive — Electrical Safety at Work
- National Hair & Beauty Federation — Salon Business Support