
How to blow dry a finish that survives humidity: remove about 80% of water first, build tension in 2-inch sections, then cool-shot each section for 10 seconds before any brush release.
Humidity beats soft, damp interiors, not well-set shape. This guide focuses on airflow direction, brush size, heat control, product weight, and salon timing so the cuticle lies flatter and the finish holds longer.
Map Your Humidity Blowout
Before the next client, set a simple humidity plan for their hair, your dryer, and your timing. Use this quick check to decide section size, brush size, heat, and product load before you start the finish.
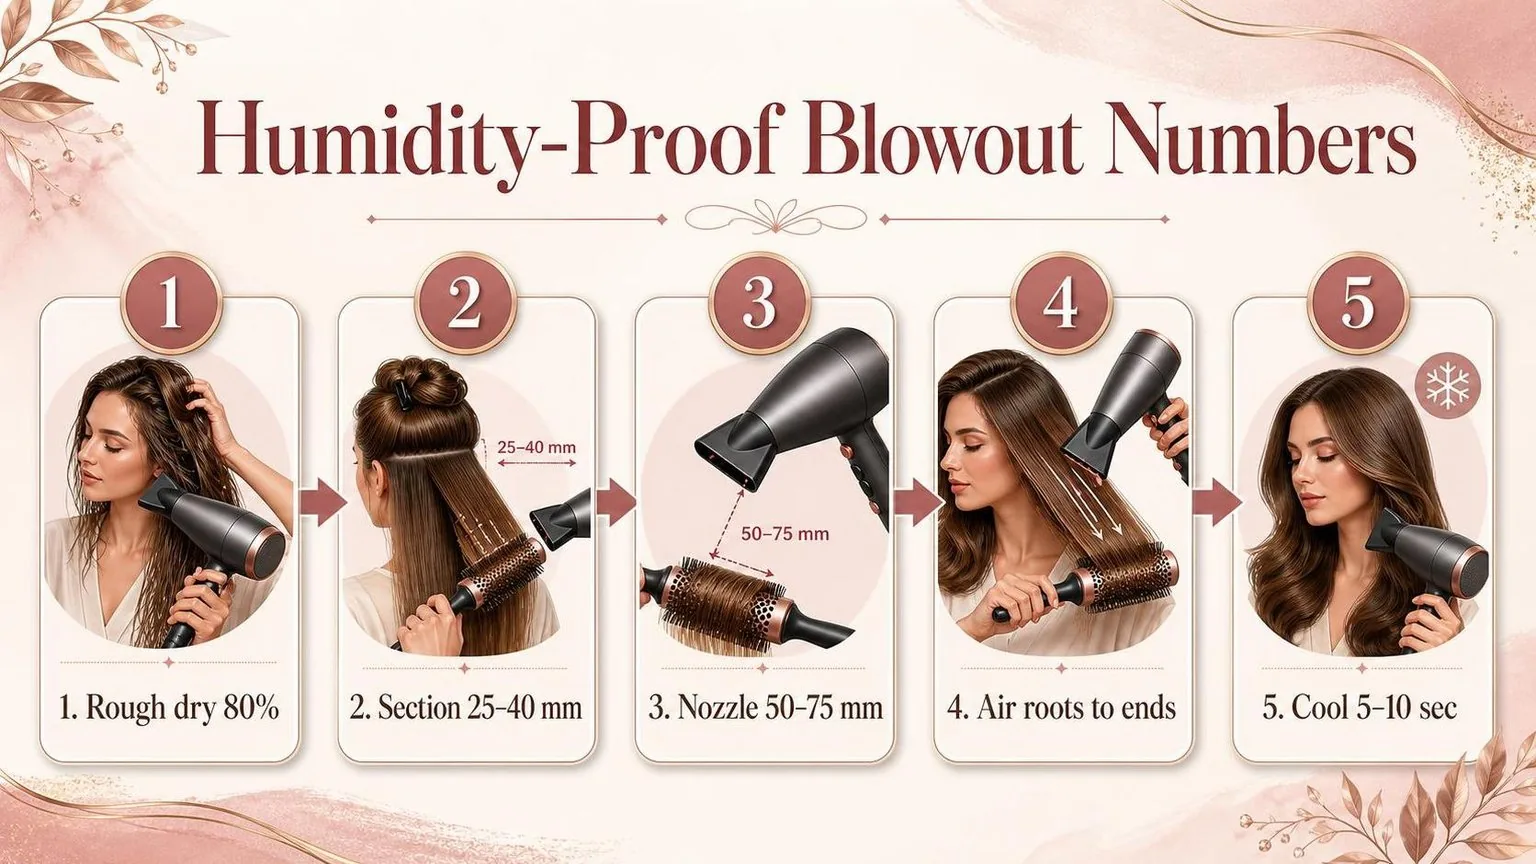
- Check the starting point. Towel-blot, detangle, then rough-dry until hair is about 80–90% dry. If the mid-lengths still feel cool, heavy, or bendy inside, keep pre-drying before picking up the round brush.
- Choose the section size. Use 2 cm sections for dense, coarse, curly, or frizz-prone hair. Use up to 2-inch sections only on fine or low-density hair that dries quickly and does not hold hidden moisture.
- Match the brush. Use a smaller ceramic round brush for lift, bend, and short layers. Use a larger barrel for smoother lengths. The section should wrap cleanly without crowding or overlapping.
- Set heat and airflow. Work around medium heat, about 80–90°C, with the concentrator nozzle aimed from roots to ends. Keep strong tension until the section feels dry, warm, and even from base to tip.
- Lock before release. Cool-shot each section for 10 seconds while the hair is still on the brush. Release only after cooling, then finish with a light anti-humidity spray, not a wet or heavy mist.
If the first section drops within minutes, reduce section size, add more tension, or extend drying time before cooling. Do not solve a damp interior with more finishing spray.
The Figures Behind It
Humidity beats a blowout when hair re-absorbs water, softens its temporary set, and moves back toward its natural pattern.
The practical target is not “more heat”; it is lower residual water, tighter fibre alignment, and a full cool-down before damp air hits the finish.
Hair is hygroscopic, meaning it takes up water from the air. Robbins’ Chemical and Physical Behavior of Human Hair describes typical hair water content as strongly dependent on relative humidity, with higher uptake as the air gets wetter.
| Condition | What matters for a humidity-proof finish |
| Low relative humidity | Hair holds less water, so a round-brush set usually stays firmer for longer. |
| High relative humidity | Hair absorbs more water, hydrogen-bond styling weakens, and frizz or collapse appears faster. |
| Fully wet hair | Fibres are swollen and flexible; shape is not locked until water is driven off and the section cools. |
The key salon number is not dryer wattage. It is the temperature and timing at the section. A professional finish usually needs controlled heat to evaporate water, then cool air long enough for the set shape to firm before release.
| Stage | Useful working number | Why it matters |
| Rough-dry before brush work | About 80% dry | Brush tension works better when the hair is damp, not dripping. |
| Brush section width | 25–40 mm | Small sections dry evenly from roots to ends. |
| Nozzle distance | 50–75 mm from hair | Close enough for direction, far enough to avoid hot spots. |
| Cool shot | 5–10 seconds per section | Lets the shaped fibre cool before the brush is removed. |
Water direction matters too. A concentrator should push airflow from roots to ends, not upward into the cuticle edge.
The Journal of Cosmetic Science has repeatedly shown that surface roughness and fibre friction increase when cuticle alignment is disturbed.
| Airflow choice | Expected finish |
| Down the hair shaft | Smoother lay, higher shine, less visible expansion in humid air. |
| Against the hair shaft | Rougher feel, more flyaways, faster halo frizz. |
For humidity resistance, the section should feel dry, warm, and firm before cooling. If it still feels cool or slightly spongy, internal water remains. That moisture will migrate, swell the fibre, and undo the bend you just built.
| Finish check | Pass standard |
| Root area | Dry to touch with no cool patches. |
| Mid-lengths | Smooth under tension, no steam, no tacky feel. |
| Ends | Polished and fully cooled before brush release. |
The Variables That Matter
Humidity-proofing is mostly about water control, tension, and cooling the hair in its final shape. Hair is hygroscopic, so it takes up moisture from humid air; that moisture disrupts temporary hydrogen bonds set during blow drying.
The finish lasts longer when the cuticle is laid flat, the roots are fully dry, and each section cools before it is disturbed.
Cosmetic science texts such as Robbins’ Chemical and Physical Behavior of Human Hair describe this water-driven reshaping as central to styling durability.
Moisture left in the hair
The biggest failure point is stopping when hair feels dry on the surface. Dense areas at the nape, crown, and behind the ears often retain moisture, then swell when exposed to humid air.
| Stage | Target before moving on | Why it matters |
| Rough dry | About 80% dry | Removes bulk water without overworking the brush |
| Brush work | Small sections, about 2.5 cm wide | Lets heat and airflow reach the full strand bundle |
| Root check | Dry to the touch at scalp lift area | Prevents collapse at the crown and hairline |
| Cool set | 10 to 15 seconds per section | Locks the temporary shape before release |
Air direction and nozzle control
Airflow should travel from roots to ends, not upward into the cuticle. A concentrator nozzle gives cleaner tension and reduces surface frizz because it narrows the air stream across the brush.
| Tool position | Practical target | Result |
| Nozzle distance | About 5 to 8 cm from hair | Strong smoothing without scorching the surface |
| Nozzle angle | Pointed down the strand | Flatter cuticle reflection and less puff |
| Brush section depth | No deeper than the brush radius | Even drying through the section |
Heat, tension, and brush size
Heat softens the temporary bonds; tension shapes them; cooling fixes them. For fine hair, too much heat can remove control by making the section flyaway. For coarse or dense hair, too little heat leaves internal moisture behind.
| Hair behavior | Brush diameter | Use |
| Short layers or fringe | 25 to 35 mm | Lift, bend, and root control |
| Medium lengths | 43 to 53 mm | Polished curve with volume |
| Long, dense hair | 55 to 65 mm | Smoother stretch with fewer passes |
Product load and humidity exposure
Too much product can attract grime and soften the shape; too little leaves no barrier. Apply lightweight styling product through mid-lengths and ends first, then use the residue near the root area only where lift is needed.
- Use smaller sections in humid weather rather than turning the dryer hotter.
- Finish with cool air until the strand no longer feels warm against your fingers.
- Let hair rest before brushing out curls or bends; disturbing warm hair weakens the set.
- Avoid steamy rooms immediately after styling; the finish is most vulnerable while cooling.
How to Judge It on Real Hair
A humidity-proof blow dry is judged after the hair has cooled, not while it is still warm and stretched. Look for smooth surface reflection, firm root direction, dry mid-lengths, and ends that spring back without swelling.
In the chair, check the finish by touch, sight, and movement. The goal is not stiff hair; it is hair that holds its shape because moisture has been driven off evenly and the cuticle has been laid in one direction.
Use a cool-down test before calling it finished
Hair can feel polished while heat is still masking dampness. Let each section cool before inspection, then press the mid-lengths between two fingers. If it feels cool, soft, or slightly spongy, keep drying with tension.
| Check point | Pass standard | What failure feels like |
| Cooling time before judging | At least 30 seconds | Shape drops as soon as the brush is removed |
| Section thickness | About 1 inch for dense hair, 1.5 inches for fine hair | Interior feels cooler than the surface |
| Nozzle distance | About 1 inch from the brush, not touching the hair | Frizz at the surface or flattened shine |
| Air direction | Root to end on every pass | Raised cuticle, dull panels, flyaway edges |
Read the roots first
Humidity exposes weak root work before it exposes the ends. Lift a section with the tail of a comb and look at the first bend from the scalp. It should be dry, directed, and consistent with the shape you want.
- For volume: the root should stand away from the head without feeling airy or rough.
- For smoothness: the root should lie cleanly without a ridge from the brush.
- For fringe or face frame: the root must be reset both directions before final placement.
Check the surface from more than one angle
Stand behind the client, then move to the side. A reliable finish reflects light in continuous panels. If shine breaks into fuzzy patches, the section was either too large, not fully dried, or overworked without enough tension.
| Hair response | Likely cause | Fix before finishing |
| Ends puff within 5 minutes | Moisture left inside the section | Re-dry smaller subsections with steady tension |
| Root collapses within 10 minutes | Root cooled in the wrong direction | Reheat, redirect, then cool in place |
| Surface turns matte | Airflow moved against the cuticle | Repeat passes from root to end |
| Shape feels crunchy | Too much product or heat concentration | Brush through, cool, and reassess movement |
Cosmetic science texts describe hair as hygroscopic, meaning it absorbs water from humid air. That is why the best real-hair test is simple: if the finish still looks smooth after cooling, combing, and natural movement, it is far more likely to last.
Set Against the Other Options
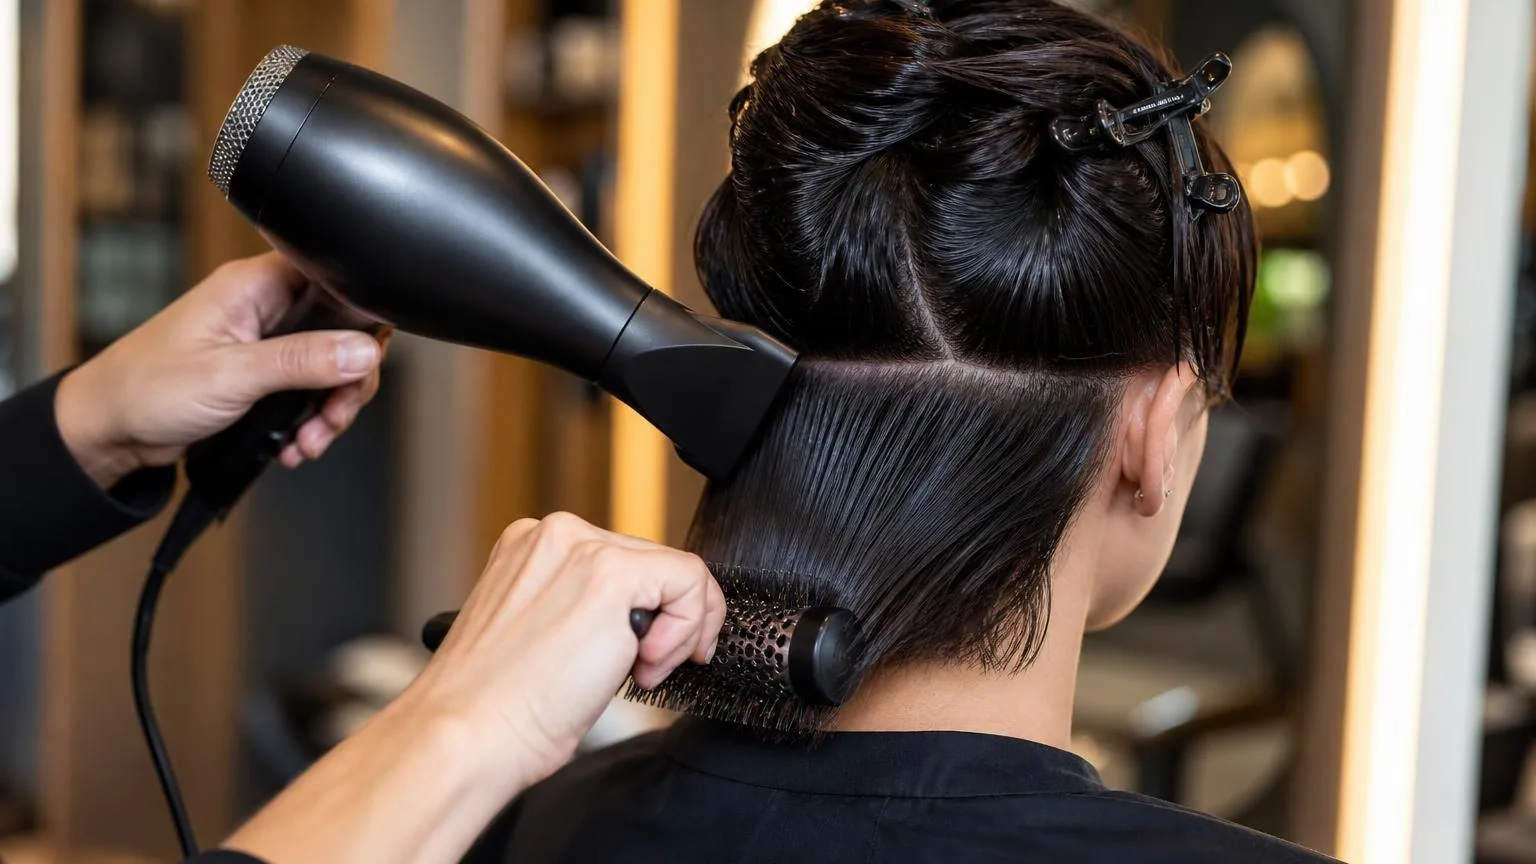
A humidity-resistant blow dry gives more control than air-drying and more movement than flat ironing. Compared with hot brushes or irons, the key advantage is sequencing: water removal, tension, airflow direction, then a cool set before finishing.
In salon practice, this finish works best when hair is dried to about 80% before section work begins. That keeps the brush from acting like a slow evaporator and reduces the time each section spends under heat.
| Method | Best use | Typical working numbers | Humidity performance |
| Round-brush blow dry | Polished volume, bend, smooth roots | 1 to 2 inch sections; concentrator nozzle 1 to 3 inches from hair; cool shot 5 to 10 seconds per section | Strong when roots are fully dry and each section is cooled before release |
| Air-dry with product | Natural texture, low manipulation | No direct heat; drying time often 1 to 4 hours depending on density and airflow | Less predictable because hair sets while exposed to ambient moisture |
| Flat iron finish | Very sleek, low volume result | Common professional range: 300°F to 410°F; sections usually 0.5 to 1 inch thick | Smooth at first, but can collapse if internal moisture remains from an incomplete blow dry |
| Hot brush | Quick smoothing and casual bend | Works best on dry or nearly dry hair; larger barrels commonly create softer bend than small round brushes | Moderate; limited airflow makes root drying and directional cuticle control less precise |
Against air-drying, the professional blow dry wins on cuticle alignment. The concentrator nozzle pushes air from roots to ends, which is the same direction stylists use when laying the surface smooth with a boar, nylon, or mixed-bristle brush.
Against a flat iron, the blow dry is less glassy but more wearable in damp air. Irons compress the surface, while a brush-and-dryer finish builds shape as the hair cools.
That cooling phase matters because warm hair drops faster when exposed to moisture.
- For fine hair: use medium airflow, medium heat, and 1-inch horizontal sections at the crown to avoid over-flattening.
- For dense hair: pre-dry in 4 quadrants, then work in 1-inch subsections so no damp interior is left behind.
- For curly or wavy hair: use stronger tension, slower passes, and a nozzle kept parallel to the strand, not pointed upward.
The hot brush is faster for second-day hair, but it is not a full substitute on wash day.
Most models style through contact heat and limited airflow, so the root area and underside can stay slightly damp, which is where humidity usually finds the finish first.
The strongest comparison point is durability per minute. A careful 25 to 45 minute blow dry usually outlasts a rushed iron-only pass because it removes moisture before shaping, rather than trying to seal over it.
Heat and Tension Without the Damage
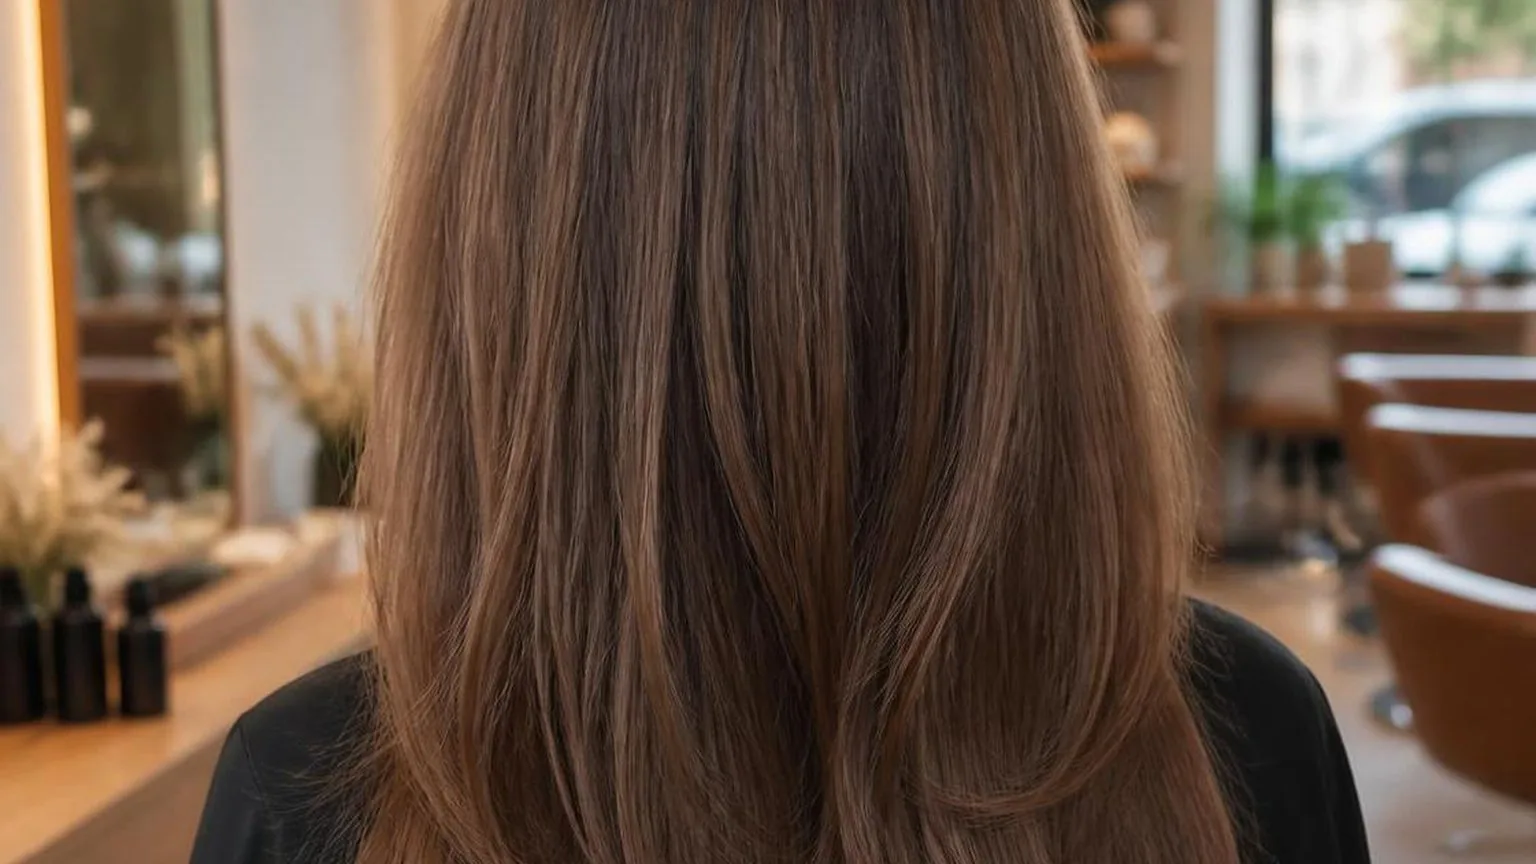
A humidity-proof blow-dry is built by drying the fibre fully, aligning it under steady tension, then letting each section cool before it is disturbed. Use enough heat to shape, not so much that the cuticle feels rough or the ends lose slip.
In the chair, I treat tension as the styling tool and heat as the setting tool. If the brush is doing most of the work, you can usually lower the heat and still get a smoother, longer-lasting finish.
| Hair feel | Nozzle heat target | Brush tension | Section width |
| Fine or fragile | Warm setting; keep airflow moving | Light stretch, no tugging at roots | No wider than the brush barrel |
| Medium density | Medium heat for shaping | Firm, even pull from root to end | Match the barrel width |
| Coarse or high density | Medium to high heat only while hair is damp | Firm stretch with slow passes | Slightly narrower than the barrel |
The important safety point is distance. The American Academy of Dermatology advises holding the dryer away from the hair and using the lowest heat setting that still dries effectively.
In practice, a concentrator nozzle should not sit flat against the hair.
| Control point | Working number | Why it matters |
| Nozzle distance | About six inches from hair | Reduces hot-spotting on one area |
| Section thickness | About one half inch at the roots | Lets air reach the damp interior |
| Cool shot | At least ten seconds per finished section | Helps the set hold before release |
| Brush barrel | One and one quarter to two inches for bend | Creates polish without over-curling |
Work from wet to dry in stages. First, rough-dry until the hair is mostly dry and no water beads on the surface. Then switch to the nozzle and brush for the final shaping passes, where smoothness and humidity resistance are actually created.
- Roots: Lift with the brush, direct airflow along the hair, and dry until the root feels dry to the touch.
- Mids: Keep the nozzle following the brush, not pushing against it, so the cuticle lies flatter.
- Ends: Reduce heat and increase brush control; ends need polish, not extra cooking.
- Release: Let the section cool on the brush or in your hand before dropping it.
Cosmetic science texts, including Robbins’ Chemical and Physical Behavior of Human Hair, describe hair as more vulnerable when wet because water changes fibre swelling and friction.
That is why high tension belongs in the damp-to-dry phase, not the soaking-wet phase.
For a finish that survives humidity, stop when the section feels dry, smooth, and cool, not merely when it looks shiny. Hidden moisture inside thick sections will re-expand the style as soon as the client steps into damp air.
The Mechanism, Step by Step
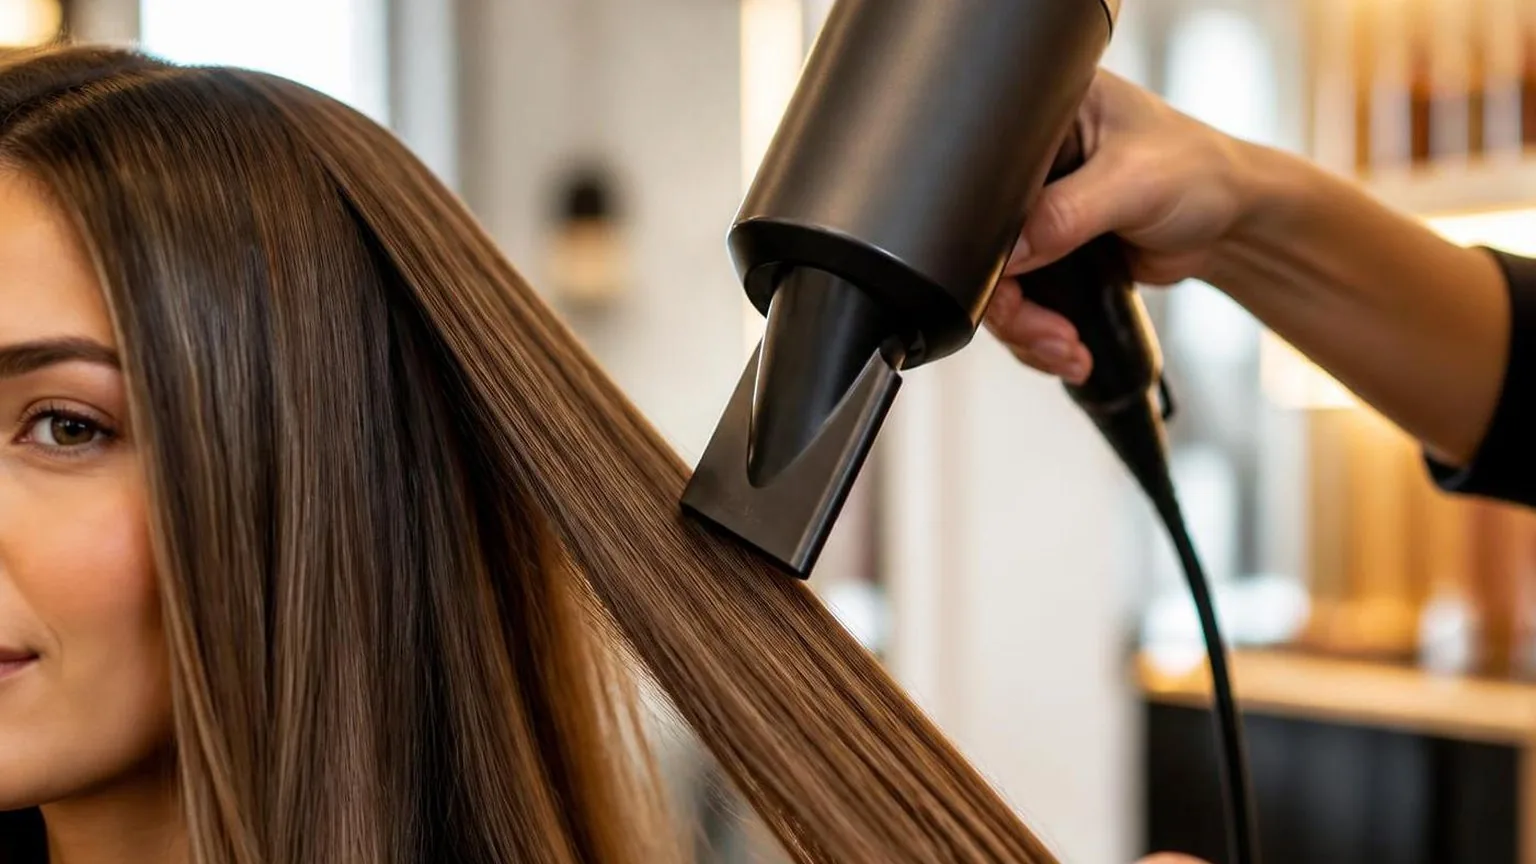
The most humidity-resistant finish comes from fully drying the hair, cooling each section before release, and keeping the airflow narrow and directional.
The key is not hotter air. It is smaller sections, slower tension, and fewer damp spots left exposed at the roots.
Humidity control depends on consistency. Shampoo, conditioner, towel-blotting method, brush type, and concentrator nozzle should stay the same so the blow-dry method does the work.
Across straight, wavy, and curly textures, the same craft rule applies: dry the interior of the section before polishing the surface.
| Variable | Working range |
| Section width | 2 inches at the hairline; 3 inches through the crown |
| Section depth | ½ inch on dense hair; ¾ inch on medium hair |
| Nozzle distance | 2 to 3 inches from the brush |
| Air direction | Root to end, nozzle parallel to the hair shaft |
| Passes per section | 3 drying passes, then 1 cool pass |
| Cool-shot time | 8 to 10 seconds before releasing the brush |
The crown is the common failure point because it holds density, lift, and trapped moisture. If that area is rushed, the root expands first while the ends can still look polished.
Clean horizontal sections help expose the underside. Drying the underside before smoothing the top creates better root control and a more stable shape.
| Method | Expected humidity response |
| Large sections, fast pass, no cool shot | Root swelling appeared first; ends stayed smoother than mids |
| Small sections, medium heat, strong tension | Shape held better through the face frame and crown |
| High heat with quick movement | Surface looked shiny at first, then softened faster |
| Medium heat with cool setting to finish | Most consistent finish across textures |
Brush tension changes memory. A round brush with firm, even pull keeps the hair aligned while heat removes moisture and sets the shape.
Aggressive stretching is not the goal. The brush should move slowly enough for the section to dry from root to end without repeatedly overheating the same spot.
- Stop each section only when it feels dry at the root, not just warm at the surface.
- Aim the nozzle down the cuticle line; cross-blowing creates visible flyaways around the temples.
- Let each finished section cool in its shape before touching it with fingers.
- Use lighter product through the roots and concentrate humidity shield on mids and ends.
The practical takeaway: humidity resistance starts before the final polish. If a section is even slightly damp inside, it will expand once moisture hits the air.
The most reliable finish comes from disciplined sectioning, controlled airflow, and cooling every section before styling the next.
Mistakes Worth Avoiding
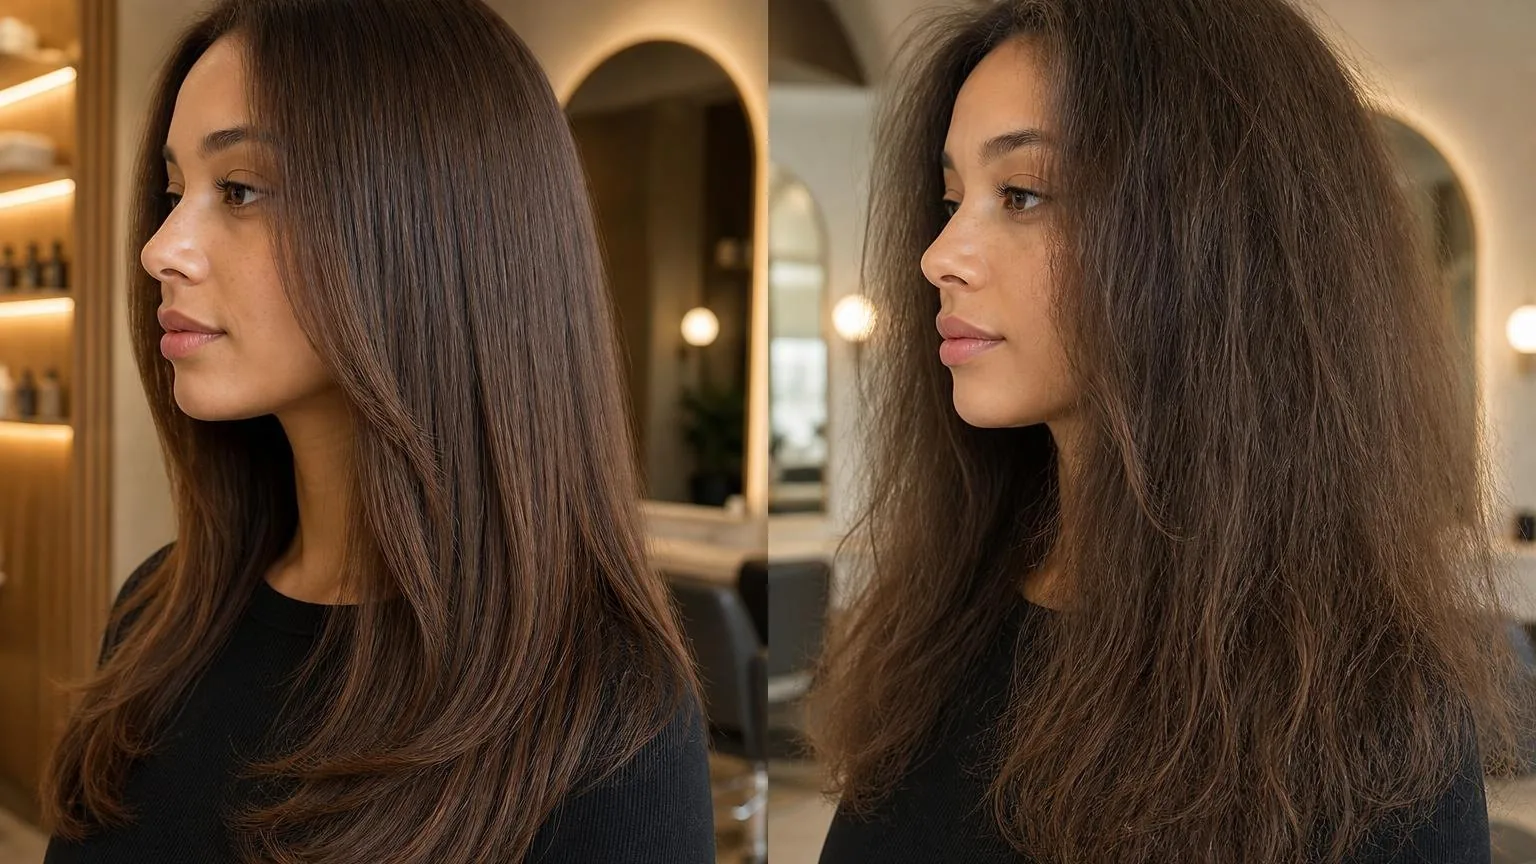
A humidity-proof blow-dry fails when moisture is left inside the fibre, the cuticle is roughed up, or the finish is touched too soon.
The biggest myths are that hotter air, more product, or a final blast of cold air can replace disciplined drying, section control, and cooling time.
Hair is hygroscopic, meaning it exchanges water with humid air.
As described in Robbins, Chemical and Physical Behavior of Human Hair, water changes hydrogen bonding in keratin, so a style that is not fully dried and set will soften faster in damp conditions.
| Mistake | Better salon target | Why it matters |
| Working with sections that are too wide | Use sections about 1 to 1.5 inches deep, no wider than the brush barrel | Air must reach root, mid-length, and ends evenly |
| Stopping at “feels dry” | Dry until the section feels warm, light, and silent on the brush | Residual water encourages collapse in humid air |
| Using maximum heat throughout | Keep nozzle air moving and avoid holding heat on one spot for more than 3 seconds | Overheating roughens the surface and weakens polish |
| Touching curls or bends immediately | Let each section cool for 30 to 60 seconds before brushing out | Shape sets as the fibre cools and hydrogen bonds reform |
| Skipping concentrator nozzle | Use a narrow nozzle, held parallel to the hair shaft | Directed airflow smooths cuticle lift and reduces frizz |
Myth: “High heat seals the hair against humidity”
Heat helps reshape hair only while moisture is being driven out and tension is controlled. Heat alone does not seal hair. A better approach is medium to high airflow, controlled tension, and a nozzle aimed from roots toward ends.
Myth: “More product means longer hold”
Too much styling cream, oil, or spray can attract grime, reduce lift, and make the finish collapse. Apply product in thin layers, mostly through mid-lengths and ends, then add hold only after the blow-dry has cooled.
Myth: “A cold shot fixes an under-dried blowout”
A cool shot helps set shape, but it cannot remove hidden moisture. If the root area still feels dense or cool, go back with warm airflow and tension before finishing.
- Do not rough-dry past control. For smoother results, rough-dry only until the hair is damp, then switch to sections before frizz forms.
- Do not aim air upward. Upward airflow lifts the cuticle and makes the finish look fuzzy in humidity.
- Do not over-brush after finishing. Brushing warm hair stretches the shape before it has set.
- Do not skip the roots. Humidity usually shows first where the hair was least dry: crown, nape, and hairline.
Frequently Asked Questions
What product order gives the best humidity resistance?
Layer lightest to heaviest: leave-in or heat protectant first, then mousse or volumising spray at the roots, then a humidity-resistant styling cream through mids and ends.
Keep product 1 to 2 inches off the scalp so the root area dries clean and maintains lift.
How dry should hair be before I start round-brushing?
Rough-dry hair to about 70 to 80 percent dry before sectioning. If you start round-brushing on dripping hair, the cuticle stays swollen longer and the shape collapses faster in humid air.
What heat and airflow settings help the finish last?
Use medium heat with strong airflow for most sections, then switch to cool air for 5 to 10 seconds while the hair is still wrapped around the brush. Letting each section cool in shape helps set the bend before humidity can relax it.
How small should my blow-dry sections be in humid weather?
Keep sections no wider than your brush barrel and about 1 inch deep. For dense or coarse hair, reduce to half-inch sections so airflow reaches the full strand bundle and removes internal moisture evenly.
What finishing step prevents frizz without flattening volume?
Mist a flexible anti-humidity hairspray from 10 to 12 inches away, then smooth only the surface with a boar or mixed-bristle brush. Avoid heavy oil at the roots; use one small drop on ends only if they look dry.
Should I cool my hair before going outside in humidity?
Yes. Let hair cool fully indoors after blow drying so the shape sets before it meets moist air. Avoid tying it up or touching it while it is still warm.
Related Reading
- What the cool shot button actually does
- Blow dry or air dry: what each does to hair
- Sectioning: the step most people skip
- What a blowout is, and how it differs from a blow dry
- How to make a blowout last past day two
- Root volume that survives the first hour
- Blow drying short hair without losing the shape
- How to blow dry your hair at home, step by step
- The complete guide to blow drying technique
- PubMed
- NCBI Bookshelf
- Occupational Safety and Health Administration
- Small Business Administration Business Guide
- Federal Trade Commission Business Guidance
- American Academy of Dermatology Hair Care
- Electrical Safety Foundation International
- UL Solutions
- EPA — Safer Choice
- MedlinePlus — Hair Problems